Category: Uncategorized

  • How to make an 808 kick with Z3TA+2

    How to make an 808 kick with Z3TA+2

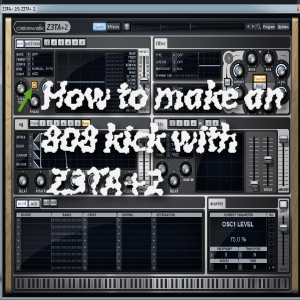
    CAKEWALK Z3TA+2 808 TUTORIAL

    How to make an 808 kick drum with Z3TA+2

    INTRO

    Z3TA+2 from Cakewalk is an excellent synth to make 808 style drums with. It’s pitch envelope allows for the 808 to hit a lot harder. Z3TA also has great effects and processors built in to add flavor to 808s.

    Let’s get started.

    Load up Z3TA+2 and Initialize the patch.

    How to make 808s with Cakewalk Z3TA+2
    Turn on OSC #1
    turn on osc1

    GENERATED SINE WAVE

    Select the generated sine wave for OSC1.

    z3ta sine selection

    This is what the default sine wave sounds like..

    ADSR

    In Z3TA the ADSR (Attack, Decay, Sustain, and Release) settings are somewhat different than other synths.
    The AMP ENVELOPE section will be used to adjust the ADSR
    To start off let’s turn all the knobs down

    ADSR Knobs turned down
    z3ta adsr knobs down

    In Z3TA the TIME1 knob will adjust the DECAY. Turn the Decay knob to taste. (the Decay will determine the length of the 808 kick).

    Decay adjustment

    z3ta decay adj

    Z3TA 808 Short Decay example

    Z3TA 808 Long Decay example

    As always adjust the Release to get rid of any clicking sounds.

    Release adjustment.

    release adj

    Listen the examples below of adjusting the release to get rid of clicking sound

    POLYPHONY

    Adjust the POLYPHONY/VOICES to 1 OR 2, to avoid more than one note playing at a time.
    (LEFT AND RIGHT CLICK TO ADJUST)

    How to make 808s with Cakewalk Z3TA+2

    EQ

    As with all 808s adding a lowpass filter can eliminate high frequencies.
    Add a High Pass filter and adjust to taste.

    z3ta filter

    Listen to examples below with and without Lowpass Filter.

    Z3TA 808 Without filter

    Z3TA 808 With Filter

    PITCH ENVELOPE

    Z3TA’s pitch envelope can work wonders when extra punch needs to be added to the 808. The modulation and routing capabilities of this synth are un-mached.

    Adjust the pitch envelope to look similar to the screenshot below.

    z3ta pitch env

    In order to hear the effect you need to set the source and destination in the modulation matrix
    Set the modulation source to Pitch EG
    Set the destination to OSC #1 Pitch
    You can experiment with different curves on your own but PITCH 4 OCT works best.

    How to make 808 kick drum with Z3TA+2

    Adjust the AMOUNT slider to taste. Turning the slider up or down will change the pitch shift from up to down. Turning the Time1 knob up a tad bit will add extra punch.
    Listen to the examples of what is possible below. Adjusting the decay will shorten or lengthen the effect.

    Z3TA Pitched 808 examples

    EFFECTS

    Z3TA+2 has some fairly decent built in effects that are perfect for 808 sounds.
    You will see how to add them to the 808. Click on the effects tab as show in the screenshot below.

    Z3TA+2 Effects
    z3ta fx tab

    DISTORTION

    Adding distortion to your 808 sounds to gives them an analog style overdrive effect. Experiment with the different distortion modes that Z3TA has to offer, and adjust the amount to taste.
    Listen to the different Distortion examples below.
    How to make an 808 kick drum with Z3TA+2

    Distorted Z3TA 808s

    COMPRESSOR

    Z3TA also has a compressor to automate gain control.

    Z3TA 808 Production

    With and Without Z3TA Compressor examples

    Other Waveforms (non-Sine)

    A sine wave is usually used to program 808 sounds with most synthesizers in existence. But that doesn’t always have to be the case. Z3TA has the capability to make custom waveforms and also has built in waveforms suitable for 808 sounds. It is possible to make various 808 sounds with character without effects. The sky is the limit. experiment for yourself and unlock the full potential of this excellent softsynth.

    Z3TA+2 was used extensively in one of our feature soundsets “Subfinity”

    Purchase Z3TA from Cakewalk here

    If you are looking for Z3TA 808 presets you can find them here.

    Synthfinity offers various 808 samples and 808 synth presets, download them here.

    In this tutorial you learned how to make 808s with Cakewalk Z3TA+2
    Stay tuned for more tutorials in the 808 secrets series from synthfinity.com.

  • Making an 808 Instrument using Kontakt 5

    Making an 808 Instrument using Kontakt 5

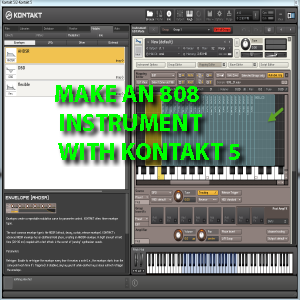
    Making an 808 Instrument using Kontakt 5

    In this tutorial you will learn how to import 808 samples into Kontakt 5 and make 808s for trap music, and hip hop..

    Why use a Sampler??

    There are numerous benefits of playing 808 sounds with a sampler rather than a synth. As each note is played the audio file, (or sample) is triggered instead of a waveform. As a result the sample being played sounds better than a waveform. Most samplers have a lot better built in effects and processors than a typical software synthesizer, which allows for more flexibility when creating sounds. Samples can be further sculpted to fit your needs.

    In this Tutorial we will be making an 808 Instrument using Kontakt 5. Abelton Live, and Adobe Audition also will be used in this lesson to edit the samples.

    Create the 808 Samples

    Load up one of your favorite 808 Synth Presets, if your are not sure how to make your own, visit one of our previous posts on 808 production tips.

    Make the MIDI file.

    Make/Draw a Midi file with notes C1 to C3 as shown in the example below. You want each note to be as long as possible, (long Decay) and make each note same length. You can download the MID file from the example “HERE”

    Midi notes of C1 to C3.
    Making an 808 Instrument using Kontakt 5

    808 C1 Audio example.

    Record enable a new track and record the Midi (C1 to C3) to a new track that will be edited later.
    Once the audio has been recorded click the “edit” button to open the file in your editor of choice. In this example we will be using Adobe Audition to chop up the 808 samples.

    Notes C1 to C3 recorded.
    Making an 808 Instrument using Kontakt 5

    *If you do not have your own Audio editor, Download the Content for this tutorial here..

    The most important thing when editing the files is to save each file strictly to a naming convention. In this example we will save each file as 808_”X”, with X being the note value. Naming the samples this way allows the samples to be imported into Kontakt 5 easier as you will soon see. All of these files will be saved to a folder.

    Once audition has loaded we will be able to save each note as a separate file. Which is easy done in Adobe Audition. Drag the mouse over each sample and press “CTRL + ATL + S” This will save the selection as a new file. Remember to stick to the naming convention.

    808 sample selected in Adobe Audition.
    Making an 808 Instrument using Kontakt 5

    Saving the selected sample. And naming the sample.
    Making an 808 Instrument using Kontakt 5

    Once saved press “CTRL + X” to delete the selection.. Do this for all of the samples from C1 to C3.

    Once you are done you should have 25 individual samples. Notes C1 to C3
    Making an 808 Instrument using Kontakt 5

    ADDING 808 SAMPLES TO KONTAKT VIA AUTO MAP

    Load up Kontakt and crate a new instrument
    kontakt loaded default

    Select all of your samples from the folder and drag them to Kontakt. At this point they will not be in order by notes. But if you named them properly the samples can be auto-mapped.

    Click on the wrench icon in the upper left and select the “mapping” tab
    mapping 1

    Drag Samples to ‘Mapping” section in Kontakt
    mapping 2

    Auto Mapping samples

    With all the samples selected right click and chose “Auto Map Setup”
    auto map setupp

    If you named your samples properly you should be able to ignore the 808, and set the note values to a single key. Click Apply and the samples will be mapped to each note.
    mapping single key

    ADJUSTING SAMPLES ACROSS KEYBOARD

    Notes C1 and C3 can be extended as low or as high as you like.
    extending

    ADJUST VOICING TO ONE NOTE AT A TIME

    Because there is no reason to play chords, or more than one note at a time with 808s, we need to adjust the voicing to 1. See screenshot below and set voicing to 1.

    voicing

    ADSR

    Adjust the ADSR to taste, we prefer to turn the Sustain down and use the decay to make the kick longer and shorter.
    Kontakt 808 Decay example

    PITCH Modulation

    Changing the 808s Pitch in Kontakt is done similar as in other synths.
    Drag and drop an ADSR envelope to the tune knob and adjust to taste.
    pitch 1

    The new envelope shows up at the bottom.
    pitch 2

    Examples of Pitched 808s in Kontakt.

    DBD (Decay, Break, Decay)

    The DBD Envelope is exclusive to Kontakt 5 only, and can make a dull 808 hit harder and cut through the mix. It can make the kick sound as if was layered with another kick.
    Drag and drop the DBD envelope to the Tune knob.

    DBD Envelope

    DBD Draged

    Adjust the DBD envelope similar to the example below. Decay #1 and #2 are turned down fairly low and the Break is turned up to increase the punch in the 808.


    DBD Adjusted for punchier 808 kicks in Kontakt 5.
    DBD

    Listen to the examples below of the DBD Envelope and how it makes the 808 punchier.

    Final Thoughts

    In conclusion, you learned how to unleash the power of Kontakt 5 and create your own 808 instrument from samples. Stay tuned for more tutorials in the 808 secrets series from synthfinity.com.

    Making an 808 Instrument using Kontakt 5 is easy but if you don’t have time to do so and
    you are looking for an 808 instrument library for Kontakt 5. Check out Subfinity. It contains over 100 808 presets that will enhance your productions.

    Synthfinity.com offers various 808 samples and 808 synth presets, download them here.

    Purchase Kontakt 5 “Here”

    Download free Kontakt 5 808 tutorial content.
    MIDI (right click and save target as)
    Samples

  • Making 808s using Ableton Live Operator Part 3 (808 instrument rack)

    Making 808s using Ableton Live Operator Part 3 (808 instrument rack)

    Making an 808 Instrument rack using Ableton Live Operator

    In this tutorial you will learn how to make an 808 instrument rack for you 808 and easily control the effects to add character to the 808 sound.

    MAKING AN INSTRUMENT RACK

    Right click on the operator and select “Group” from the menu. Operator is now in its own instrument rack
    operator inside 808 rack
    -drag and drop any effects you would like inside the rack. In this example we will be using Overdrive

    ADSR

    To start off we will map Operator’s ADSR controls to the Macros 1 thru 4 of the Instrument rack.
    To do so right click the Attack setting in operator and select “map to macro 1”
    macro mapping 1 attack
    Do the same for the Decay, Sustain, and Release, to macros 2, 3, and 4.
    The macros can be re-named to whatever you like. To rename the Macros right click and select “rename” 808 Instrument rack

    ADSR renamed
    Parameters that have been mapped will have a purple dot next to them.

    Lets continue on and map the remaining 4 Macros to our FX.

    Overdrive

    Right click on the Dry/Wet control of the Overdrive effect and map it to Macro #5
    Right click on the Tone control of the Overdrive effect and map it to Macro #6
    Rename the Macros to O-Driver and Tone.

    Saturator

    Right click on the Dry/Wet control for the saturator effect and map to Macro # 7

    Limiter

    Right click on the Gain control of the Limiter and map it Macro # 8.
    Rename the Macro.

    Screenshot of all macros mapped

    808 Instrument rack

    In this tutorial you learn how easy it is to map effects to macros within an 808 instrument rack in Ableton. Ableton also allows you to rename your instrument racks and save them for use later.

    Operator was used extensively in one of our feature soundsets “Subfinity”
    Download free Operator 808 presets here
    Purchase Ableton Operator
    Ableton Live Homepage

    Synthfinity offers various 808 samples and 808 synth presets, download them here.

    Stay tuned for more tutorials in the 808 secrets series from synthfinity.com.